
unleash
Single-script MDM bypass for macOS
unleash
Single-script MDM bypass for macOS
Install · Quick Start · Commands · How It Works · Troubleshooting
--- unleash replaces the original five bypass-mdm scripts with a single file that handles every layer of Apple's MDM enrollment: DEP markers, network blocking, daemon overrides, user-level artifacts, and kernel-level firewall. Works from Recovery mode on Apple Silicon and Intel. --- ## Install **Homebrew (easiest)** ```bash brew install mateussiqueira/unleash/unleash ``` **Direct download** ```bash curl -L https://raw.githubusercontent.com/mateussiqueira/unleash/main/unleash-standalone.sh -o unleash chmod +x unleash ``` **From a USB drive (for Recovery mode)** 1. Format a USB/SSD as FAT32, APFS, or exFAT 2. Copy the `unleash` folder (or just `unleash-standalone.sh`) to the drive 3. Boot to Recovery and run from `/Volumes/YourDrive/unleash` --- ## Quick Start ### Recovery mode (standard bypass) 1. Boot to Recovery: - **Apple Silicon**: hold power button → Options → Continue - **Intel**: Cmd+R on startup 2. Open Terminal (Utilities → Terminal) 3. Run: ```bash "/Volumes/YourDrive/unleash" bypass ``` 4. Follow the prompts to create a temporary admin user 5. Reboot. MDM enrollment will be suppressed. ### Booted system (already set up) If you already have a Mac that was previously bypassed and MDM came back after an update: ```bash sudo ./unleash heal ``` Or to check your current status: ```bash sudo ./unleash status -d ``` --- ## Commands ### Bypass & suppress | Command | Description | Recovery | Booted | |---------|-------------|----------|--------| | `bypass` | Full bypass: create admin user + suppress MDM | ✓ | ✗ | | `suppress` | Suppress enrollment without creating a user | ✓ | ✓ | | `heal` | Re-apply suppression after macOS updates | ✓ | ✓ | | `persist` | Install LaunchDaemon for auto-heal on every boot | ✓ | ✓ | | `unpersist` | Remove the auto-heal LaunchDaemon | ✗ | ✓ | ### Firewall & hardening | Command | Description | |---------|-------------| | `firewall` | Block Apple MDM IP ranges via pf (DoH-proof, kernel-level) | | `firewall-off` | Remove pf firewall MDM block | | `whitelist` | Block MDM domains only, keep iCloud/App Store working | | `harden` | Kill MDM processes, remove profiles, flush DNS — from the booted system | ### Diagnostics | Command | Description | |---------|-------------| | `audit` | Deep MDM scan — profiles, certificates, launch agents, risk score | | `check` | Pre-format / pre-upgrade assessment — will this Mac lock after wipe? | | `doctor` | Pre-flight diagnostics — root, Recovery, libs, disk, dependencies | | `status` | MDM enrollment status (use `-d` for deep mode) | | `report` | Full system report in human-readable or JSON format | ### Monitoring | Command | Description | |---------|-------------| | `monitor` | Watch MDM state every 5 minutes, auto-heal if needed | | `monitor-stop` | Stop the background monitor | | `monitor-status` | Check if the monitor is running | | `monitor-install` | Install monitor as a LaunchDaemon | ### VPN kill-switch | Command | Description | |---------|-------------| | `vpn-kill` | Install pf kill-switch — blocks MDM outside the VPN tunnel | | `vpn-kill-remove` | Remove the VPN kill-switch | | `vpn-kill-status` | Check VPN kill-switch state | ### Utilities | Command | Description | |---------|-------------| | `update` | Self-update from the latest GitHub release | | `uninstall` | Complete removal with safety prompts | | `reinstall` | Uninstall + install (atomic update) | | `config` | View or edit persistent settings in `~/.unleash.conf` | | `backup` | Save current state for later restore | | `restore` | Restore from a previous backup | | `demo` | Simulated bypass flow — no real changes | | `test` | Dry-run simulation of any command | | `dualboot` | Target an external or dual-boot volume | ### Aliases Every command has a short alias: ``` by = bypass fw = firewall fw-off = firewall-off sv = suppress mn = monitor doc = doctor st = status up = update uni = uninstall rei = reinstall vk = vpn-kill vkr = vpn-kill-remove vks = vpn-kill-status ``` --- ## How It Works MDM (Mobile Device Management) operates in four layers on macOS. Unleash blocks every layer: ### Layer 1: DEP enrollment markers In `/var/db/ConfigurationProfiles/Settings/`, Apple stores `.cloudConfig*` files that flag the Mac as DEP-enrolled. Removing these is the standard bypass approach, but macOS can recreate them from cached data. **What unleash does**: Removes all `.cloudConfig*` markers, creates decoy files that tell macOS the device was never enrolled, and prevents re-creation by also blocking the network layer. ### Layer 2: Network blocking The MDM enrollment process phones home to Apple's servers. Blocking these domains prevents the device from checking in. **What unleash does**: - **`/etc/hosts`** (basic): Blocks 13+ Apple MDM domains including `deviceenrollment.apple.com`, `mdmenrollment.apple.com`, `iprofiles.apple.com`. Can be bypassed by DNS-over-HTTPS. - **pf firewall** (advanced): Kernel-level packet filtering that blocks MDM IP ranges even when DoH is used. Installed via `firewall` command. ### Layer 3: Daemon overrides macOS ships with enrollment daemons (`ManagedClient.enroll`, `activationd`) that trigger enrollment on boot. Disabling these prevents automatic MDM checks. **What unleash does**: Creates `launchd` disabled plists for 4 enrollment-related daemons, preventing them from starting. ### Layer 4: User-level artifacts Migration Assistant and user login caches leave MDM enrollment data in `/Users/*/Library/Preferences/` and `/Users/*/Library/Caches/`. This is the #1 reason MDM comes back after a successful bypass. **What unleash does**: Scans every user's Library directory and removes `com.apple.mdm.plist`, `com.apple.mdmclient.plist`, and `com.apple.enrollmenttool` cache. --- ## Troubleshooting ### MDM returns after reboot The most likely cause is user-level artifacts. Run from Recovery: ```bash sudo ./unleash suppress ``` Or from a booted system: ```bash sudo ./unleash harden ``` ### "Not a known DirStatus" error The script auto-detects volume names, but if you have a non-standard setup: 1. Run `diskutil list` to find your Data volume 2. Mount it: `diskutil mount /dev/diskXsY` 3. Re-run unleash ### Profiles still shows enrollment This is cosmetic. macOS stores profile state on the read-only SSV (System Sealed Volume). Check the actual DEP markers instead: ```bash sudo ./unleash status -d ``` ### FileVault is enabled Unleash will detect FileVault and prompt for the recovery key or volume password. If automatic unlock fails, unlock the volume manually in Disk Utility first. ### macOS update re-enabled MDM Run `sudo ./unleash heal` after any macOS update. If you used `persist` before the update, it does this automatically on next boot. ### Monitor won't start Check if it's already running (`monitor-status`), check permissions (needs root), and check logs at `/var/log/unleash-monitor.log`. ### Can I use iCloud after bypass? Yes, but: - The basic `/etc/hosts` block also blocks `albert.apple.com` (iCloud activation) and `gdmf.apple.com` - Use the `whitelist` command instead of `firewall` to block only MDM domains and leave iCloud/App Store working - Or manually remove those two lines from `/etc/hosts` --- ## Terminal Demo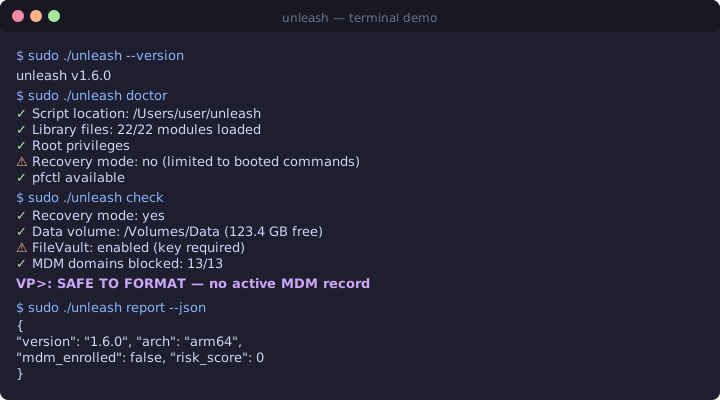 ---
## Links
- [GitHub Repository](https://github.com/mateussiqueira/unleash)
- [Full README](https://github.com/mateussiqueira/unleash/blob/main/README.md)
- [Quick Reference (QUICKSTART.md)](https://github.com/mateussiqueira/unleash/blob/main/QUICKSTART.md)
- [Changelog](https://github.com/mateussiqueira/unleash/blob/main/CHANGELOG.md)
- [Contributing](https://github.com/mateussiqueira/unleash/blob/main/CONTRIBUTING.md)
- [Code of Conduct](https://github.com/mateussiqueira/unleash/blob/main/CODE_OF_CONDUCT.md)
- [Security Policy](https://github.com/mateussiqueira/unleash/blob/main/SECURITY.md)
- [Discussions](https://github.com/mateussiqueira/unleash/discussions)
- [Report a Bug](https://github.com/mateussiqueira/unleash/issues/new?template=bug_report.md)